Friday, 27 December 2019

Dionne’s Draught Excluder 2019 - Part 5

Dionne’s Draught Excluder 2019 - Part 5

This week’s blog will be slightly longer as I found some of the pictures that I meant to put in the last blog but couldn’t find.

Assorted Trimmings


I have been Stuffing the Legs with various bits of Trimmed material. Those that follow my blogs regularly might recognises the material as off cuts from Mademoiselle Marionette’s clothes and accessories.

Sewing Leg End


When I decided that the Leg was sufficiently stuffed I simply Blanket Stitched the last flat part together. I have left about a fingers Width gap without Stuffing.

4 Inch Mark


I Folded the material then measured and Marked 4 Inches. This represented the approximate Length of the Thigh.

Back Thigh


Using the Mark I drew upwards making a Thigh shape. I Pinned the material together to avoid it slipping when I cut it out.

Front Thigh


Although the process for the Front Thigh was the same as the Back this was about a centimetre shorter. The Width was slightly less to keep the proportions correct.

Replica Thighs


To make a pair of Thighs for the other side of the Body I simply Pinned to more material and cut out around them.

Thigh Attached


IMPORTANT
When Attaching the Thigh to the Leg make sure that you have slipped the Leg End into the Thigh Horizontally before you Sew. Otherwise it will be at the wrong angle.


Thursday, 19 December 2019

Dionne’s Draught Excluder 2019 - Part 4


Dionne’s Draught Excluder 2019 - Part 4

With the run up to Yule and Christmas or as I refer to it the ‘Silly Season’ I have decided to make this a short blog.

Black Paw Outline


The part I am working on this time is making a Paw. I Fold the material and then draw a Rectangle in Chalk on it. I Pin the material together so it doesn’t slip whilst I cut out.

Black Paw Replication


The easiest way to get the other Paws was to Pin the first one I cut out onto the Folded material again. I could then Replicate the Paws until I have 4 in total.

Paws Four One


Once I had cut out all 4 Paws I proceeded to Blanket Stitch the Edges nearly to the end. I then strengthened them by using a Tacking Stitch underneath.

In the photograph above the Top Paw is how it looks when I finished Sewing. The 3 Paws underneath have been turned the Right way around.


Thursday, 12 December 2019

Dionne’s Draught Excluder 2019 - Part 3

Dionne’s Draught Excluder 2019 - Part 3

Time for a change.

Mixed Template Sizes


Since I was having a bit of trouble with Sewing I thought I would swap to something different. I wanted a Pom-Pom so first I had to get my equipment.

I can’t say how long I spent rummaging around the place trying to find something to draw around. Nothing was the right Size. In the end I had to use a Pasta Measure for the Interior hole. I was then forced to use the Arch shape of the end and keep turning it until I got an Outer Circle I could cut out.

Good Judgement


Well I must admit I am impressed. I Judged the Size and Wool to perfection. It is about time something went right. Not only that the Wool I was using was some that I had hand spun.

Fluffy Pom-Pom


I have now spread, tied and cut out the Pom-Pom. This is an unusual step for me because I usually have already made the item for which to put one on.

There are Full Instructions on how to make a Pom-Pom in previous blogs. See - Watch Out There’s A Minx About 2019


Thursday, 5 December 2019

Dionne’s Draught Excluder 2019 - Part 2

Dionne’s Draught Excluder 2019 - Part 2

From time to time all Crafters no matter what tools or materials they use will have one of those days when things just don’t want to go right. This week it is my turn. I haven’t got nearly as far as I intended.

Cut off Sleeves


It started off alright. I had cut off Sleeves which would do for the material that I wanted. These I washed and pressed ready for cutting.

13.5 Inch Circumference


The first Problem I encountered was that my Tape Measure had disappeared. Therefore I was forced to use my Metal one which does not like bending into a Circle. This End was not too bad and I managed to get the measurement of 13.5 Inches.

Other End


The Other End simply would not play ball. It kept springing all over the place. Normally what I would do in this case is use a piece of String to follow the Curve and then Measure that.

Of course even though my place has enough String, Thread, Wool and Yarn in it to knit jumpers for a flock of sheep not one piece was available to hand. Typical!

Trio of Circles


Once I obtained the Measurements (which incidentally were not equal and therefore a challenge I will have to sort another day) I needed to find something to Draw around.

I need not mention how much fun it is to Measure half a dozen Circular objects with a Metal Measure, especially when quite a few were at a gradient like plant pots.

Rough Cut Circles


I couldn’t find a single object of the right size to Draw around. Eventually I decided to pick a larger version and once cut I would shrink using a combination of Trimming and Hemming.

Naturally as soon as I wanted to Draw around the pot I found that my Chalk had disappeared. After spending 20 minutes finding another piece and Cutting out I decided to quit Crafting before anything else could go wrong.


Thursday, 28 November 2019

Dionne’s Draught Excluder 2019 - Part 1


Dionne’s Draught Excluder 2019 - Part 1

I know I have already blogged about making a Draught Excluder before but it was quite a while ago. This has come around as an old fashioned Barter exchange. Ideal for these times of Austerity.

Rough Tube Material


First you need material to make a Tube. This is to make the Body. Before you cut it out make sure that the Length will go across the whole of the Door.

Wrong Side Hemmed


Marvellous. I have just started and already I have make a blunder. I am Hemming the edge of the material and have turned it the Wrong way.

Right Side


The above photograph shows the way it should have been Hemmed. However I will be able to cover it up during overlapping the Tail End.

Blanket Stitch


I have placed the two edges together and Blanket Stitched along the length of the Tube. However I have not Sewn right along to the Ends as I want these to be more flexible.


Thursday, 21 November 2019

More Blooming Flowers 2019 Part 5

More Blooming Flowers 2019 Part 5

This week’s blog is short and sweet as I am reaching the Finale.

Tiny Yellow Stitches


I am now beginning to start the Stamens. These Stitches have to be very Tiny. I am Backstitching in a Circular Pattern

Finished Yellow Middle


Once I have completed the Circle I have simply added a few extra Stitches over the Middle.

Yellow Ring


Now I have got the hang of the process I continue filling the Middle of all the Outer Blooms.

Fully Completed Yellow Interior 


I have now Fully Completed the Yellow Interior of the Bloom. Needless to say it was both fiddly and laborious.


Thursday, 14 November 2019

More Blooming Flowers 2019 Part 4

More Blooming Flowers 2019 Part 4

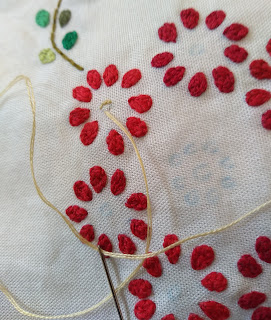
It has been awhile since I blogged about this project so here is an update.

Wonky Petal


If I remember correctly I was discussing problems that occur. This problem is one of my own making. Somehow I haven’t correctly followed the outline of the Petal.

Embroidery Mess


This meant that I had to go over the Petal until I readjusted the shape. Consequently as you can see it has made a Mess of the back.

Different Pair of Blooms


Finally I am on to the Large Circular Bloom. If you look at the above photograph you will find Two Pairs of different coloured Blooms.

This is not a mistake. There are two reasons for this. One is I am trying to break up the colour scheme. I do not want the Single Blooms and the Large Blooms the same where they together.

The other reason is I am trying to max out my thread supply. I don’t want to be half way through Bloom and find that I have run out.

Untidy Bloom


A word about Tidiness. Although I have mentioned it before I think in the photograph above you can see properly how bad thread and mistakes make the reverse of the Blooms very knobbly and Untidy.

Tidy Bloom


In this photograph you can see the difference. I was lucky to have much better thread which in turn led to less mistakes and being far Tidier.

Finished Red Petals


I have now finally finished the Red Petals in all the Blooms.