Friday, 18 March 2022

Nott’s County Scarf 2022 - Tassels

 Nott’s County Scarf 2022 - Tassels

It is a long time since I have added Tassels to anything. First thing to sort was the Colour. After checking the Nottingham County Football Club site I discovered the Tassels are White not Black.

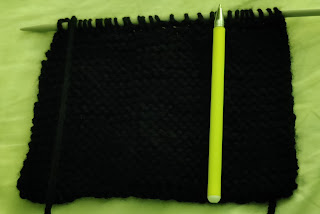
6.5 Inches


I needed a decent amount of Yarn for the Tassels. I found an old Chalk Board. I turned it on its side and the length was 6.5 Inches.

Wound Yarn


I wound the Yarn around the Board in Strands of 4 until I reached the End.

Cut Along Edge


I cut along the Edge of the Board so I now a group of pieces of Yarn ready for use.

Hook through Back


I don’t Crochet but I do have a couple of Hooks I use for jobs like this. I pushed the Hook through from the Back of the Scarf.

Add Yarn to Hook


I took 2 of the Strands folded them and placed them on the Hook

Pull Yarn through


I gently pulled the Hook through the Knitting making sure that the Yarn didn’t slip off. This made a Loop.

Thread Ends Through


I then slipped the 4 Strands through the Loop keeping them even.

Pull Tight


Next I Pulled the Loop Tight. I then repeated the process on the other End. I continued this process working towards the Centre. Then I trimmed up the Ends to make sure they were all even.

Danny Scarf


All that was left was to model it. Here is Danny wearing the Scarf. It is a slightly older style but the Length looks good on him and it is very warm. He seems very happy with his Christmas Present and that in the end is the whole point of Hand Knitted Gifts.

Thursday, 10 March 2022

Nott’s County Scarf 2022

 Nott’s County Scarf 2022

Sometimes I don’t pick projects sometimes they are picked for me. This is one of the cases when my boyfriend Danny decided he wanted me to Knit him a Nottingham County Football Scarf for Christmas.

Disaster


I had some Black Yarn from another project so started Knitting. I am not sure of the needle size as using the pair of wooden ones I had been given. I needed big Needles as the wool was Super Chunky.

However when I visited the shop in my hometown I discovered that they didn’t do the same Yarn in White. Now my Football knowledge isn’t great but I do know the colour scheme. I had to rethink.

Stylecroft Special


After a scout around and discussion with the owner we plumped for a Yarn called Stylecroft Special. The Yarn was not as Chunky so I now had to change Needles.

Garter Stitch


The Needle size was now a 6mm. I began to cast on and start Knitting a Garter Stitch. This particular Stitch was decided on when I explained the tendency for Stocking Stitch to Curve inwards.

Not long enough


I had tried with a various number of Stitches and finally decided that 30 was the right amount. Now I had to check the Length. I had decided that it wasn’t long enough.

I asked my boyfriend how he actually wanted it and he said like a square. I added more rows until I thought it looked right. I folded it Diagonally and lo and behold I had had Knitted an exact Square.

Add White


With the Black Square done I could now add the White Yarn.

Add Black


Now I could really see the Pattern emerging. I began to add the Black Yarn again and then repeated the Colour Scheme until it was long enough. My boyfriend is 6ft 2 so I decided a short Scarf would look ridiculous.

Since it had to end on a Black Square the Scarf ended up being approximately 7ft.

Sew Tails


I cast off the Yarn and then I had to turn my attention to the Tails and Sew them in so it looked neat. My next job will be making the Tassels.

Thursday, 3 March 2022

Refurbished Mini Footstool 2021 Part 2

 Refurbished Mini Footstool 2021 Part 2

The next bit was a little difficult and I was tooing and froing but hopefully I can get the photographs in a reasonable order.

Problem Material


I have accidentally cut the Rear Material Short. Not only that I have managed to snip a hole in it too. I made a Short as possible Hem.

Rear of Stool


When Gluing in place I had to really pull the Material down to the Edge. I also Sewed it at the Bottom of the Hem to the Stool to Secure it.

Remove Excess


As I have had to pull the Material around to Cover the Back I had to Cut off Some Excess Material

Glue and Pin Rear


If you look at the above photograph of one of the Sides you will see that the Right Hand Side is quite full. However on the opposite side which is coming from the Rear it is almost Vertical.

Sew to Secure


After Gluing the extremely Short Fold I Secured it by Sewing.

Mini Footstool


I now have a finished Mini Footstool that just needs to dry a little more.

Upholstered Set


I now have an Upholstered Set of Chaise Longue, a Footstool and a Mini Footstool.

Thursday, 24 February 2022

Refurbished Mini Footstool 2021

 Refurbished Mini Footstool 2021

With the Chaise Longue and Footstool looking nice I just had to do the Mini Footstool too.

Red Footstool


The Mini Footstool is sturdier than the other Footstool and will have to be covered properly rather than a Slipcover.

Initial Pins


First I check how much material I need by a Corner with a couple of Pins. I need to be able to Cover the Centre and the Edges.

Glue Top


I spread the Glue all over the Top of the Mini Footstool so I can begin sticking the material.

Glue and Pin Front


I Glue what I am going to refer to as the Front of the Mini Footstool. I then proceed to carefully place the material over that so it Covers the Edge.

Next I place the material over the Glued Top of Stool. I then put a couple of Pins in the Front to hold whilst drying.

Glue and Pin Sides


I Glue and Pin the material along the Sides of the Mini Footstool.

Glue Left


That was the easy bit. I now have to make the Edges look neat. I am going to do that by Folding the Corner around from the Front.

I Glue the Triangular Shape and Press it tight against the Side keeping the Bottom Edge level.

Glue and Pin Side


The material on the Right Side which would be coming off the Rear of the Stool was slightly long. I Cut and Hemmed this part prior to Gluing and Pinning.

Thursday, 17 February 2022

Refurbished Footstool 2021

Refurbished Footstool 2021

I am going to continue to try and blend my furniture together so I am having a go at this IKEA Footstool. If it goes wrong it doesn’t really matter because I have had it for years and it only cost me 50p in the first place.

Footstool


Apart from wanting to blend in this Navy Footstool I have another reason for wanting to Cover it. The Zip is broken so I can no longer wash it.

Flip Side


I am not strictly measuring this material it is the one that I that I rejected for the Chaise Longue Curve. I Flip the Cushion and place on the material.

Fold Over


If you look in the above photograph you can see that I haven’t placed the Cushion directly in the Centre. This is because I want to avoid the Mark. 

Sew Bottom


Once Folded over I Sew across the Bottom. As you can probably tell from the above photograph this isn’t going to be fully enclosed. I am having this as a Slip Cover.

Sew Fold Over


Next I Fold Over the Bottom and Sew along the Edge. I repeat this at the Opposite End.

Chaise and Stool


Chaise and Stool together. I think they look rather natty.

Thursday, 10 February 2022

Chaise Longue Chat 2021 Refurbishment Part 5

 Chaise Longue Chat 2021 Refurbishment Part 5

This is the final Part of the Chaise Longue Refurbishment. I am moving on to the Skirt.

Scratch Marks


Oh no I discovered that all the moving has Scratched my new Paintwork.

Permanent Marker


I didn’t want to risk Repainting the Legs with my material flapping around so I did a quick touch up with a Permanent Marker.

Measure Skirt Rear


I measured the material I needed for the Rear and Side Skirt. I am not going along the Full Rear of the Chaise Longue as I don’t want it catching on things.

However I do want it to Cover the Plastic Part so I have to make sure that I have enough material to do so once Hemmed.

Glue Back and Side


Once Hemmed I Glued the material in place. I also added a few Stitches for Strength 

Glue Front


After the Side had dried I started on the Front Skirt. I turned the Chaise Longue on its Rear to make life easier for the Gluing and next step.

Nail Front


I wanted the Chaise to fit in with the Boxes I had already done. So I decided to Hammer Brass Tacks along the Top of the Skirt. This is not only aesthetic but will give added strength for when the Skirt is lifted to fetch items from underneath the Chaise.

Chaise Longue Complete


Voila! The Chaise Longue is now upright and Complete. I added a few more Tacks to help Secure the material around the Front Part Edge. I also placed Tacks where the original Buttons were.

The Skirt isn’t quite as Straight as I would like nor are the Tacks completely even. However the Tacks had to contend with unseen brackets. It may not be perfect but I am exceptionally pleased with my efforts.

Thursday, 3 February 2022

Chaise Longue Chat 2021 Refurbishment Part 4

 Chaise Longue Chat 2021 Refurbishment Part 4

A nice short blog this week.

Tabs Together


Remember the Tabs I removed right at the beginning of the project. Well now I am going to Sew them together using a Blanket Stitch.

Glue Rear Panel


I Sewed 16 Tabs together. I then Glued the Rear of the Chaise Longue and placed them En bloc across the Lower Part.

Glue and Patch


I had quite a few Offcuts left so I decided to use the bigger pieces to Patch the Top.

Edge Bottom


I had some Long Strips of material that were from part of the Hem of the Curtains. These were ideal to use as Edging.

Rear Patched


I Sewed another couple of Tabs together this time End to End. This Covered a great deal of the scrappy Patching and made it look neater.