Thursday, 16 January 2020

Dionne’s Draught Excluder 2019 - Part 8
Dionne’s Draught Excluder 2019 - Part 8

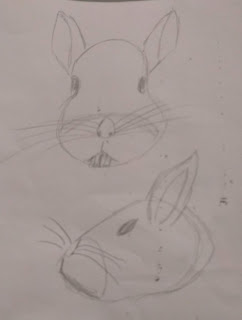
I am no artist but I need something I can use as a guide so out with Pencil and Paper.

Rough Rabbit


This is a Rough sketch of the Front and Side view of a Rabbits Face.

Rough Face Outline


I Draw the Rough Outline of the Rabbits Face in chalk then cut it out.

Even Up Face


I Fold the material in half. I then trim the Face until both sides are Even.

Checking for Size


I check the Black Face material against the Stuffed Body. I have managed to get it large enough.

Black Face Hemmed


I Hemmed the Black part of the Rabbit Face and Pinned it against a piece of White material.

White Rabbit Hemmed


With the material Pinned in place I start to Hem the White material. I did not go all way up to the Top. This is because I want to curve that part of the White material.


Thursday, 9 January 2020

Dionne’s Draught Excluder 2019 - Part 7

Dionne’s Draught Excluder 2019 - Part 7

I am now moving onto the Tail End part of the Draught Excluder.

Hemmed Tail End


Taking one of the black cut out Circles I Hemmed it with a simple Tacking Stitch

Attach to Top


I began by making a few Tacking Stitches to hold the Circle in place. This will stop it moving around whilst I do the next piece.

Part Sewn End


From where I attached it I Blanket Stitched the Circle to the Excluder. I Sewed 90 degrees in both directions. Thus leaving half of it still Unsewn

Double Thread


Taking the Pom-Pom I had made I Threaded the needle with both Threads of Wool. I then proceeded to Sew the Pom-Pom to the middle of the Circle. I also Sewed through the Pom-Pom as well as the material in order to give it extra strength.

Gathered Excess Material


Now the Pom-Pom is Sewn in place I can continue to finish Blanket Stitching the Circle to the Excluder. I found that I have Excess material. Therefore I have to gather the material prior to Sewing.

I do this by putting the needle through the Excluder as usual. However each time I make a Stitch I take a little Extra material from the Circle part.

Tail Added


I have finished Sewing all the way around. By using the Double Thread and Sewing through the Pom-Pom it has stayed in the Centre of the Circle rather than dropping.

I can now begin to Stuff the Body.


Thursday, 2 January 2020

Dionne’s Draught Excluder 2019 - Part 6

Dionne’s Draught Excluder 2019 - Part 6

Now the Legs and Thighs are Attached I can start on the next bit.

Thigh Tube Closed


Last time I had added the Leg and Thigh together and sewn at an angle. This left part of the Tube loose and untidy. If you look at the bottom of the photograph above you can see this clearly.

In order to tidy this area I bent the loose part back on itself. Then I Sewed it to the Thigh as show at the top of the photograph. I did this with all four but I made sure that each pair was Folded opposite. If I hadn’t one side of the Body would look untidy.

End Measurement


The next part of course is to add the Thighs to the Body. However getting the right Height was essential. Too High and it would flap about and too low it would be trailing on the floor.

Mark Attachment Area


After I had puffed out the Body by slipping it over a water bottle I now had a 3 Dimensional image to work with. I could then place the Thigh against the Body and Mark where to Attach.

Velcro Thigh


In previous Draught Excluders I have Sewn the Legs in Place. However this time I decided to use Velcro. I felt that this would give me more leeway when Attaching the Thigh.

You see I have carpet but the recipient has hard flooring. Therefore there would be a slight difference in Height. I always think better safe than sorry.

Thigh Attached


With the other side of the Velcro (The Loop) Sewn on the Body I can now put them together.  One Thigh Attached Three to go.

Incidentally I decided to use the Velcro that way around as it meant the Body would be softer.


Friday, 27 December 2019

Dionne’s Draught Excluder 2019 - Part 5

Dionne’s Draught Excluder 2019 - Part 5

This week’s blog will be slightly longer as I found some of the pictures that I meant to put in the last blog but couldn’t find.

Assorted Trimmings


I have been Stuffing the Legs with various bits of Trimmed material. Those that follow my blogs regularly might recognises the material as off cuts from Mademoiselle Marionette’s clothes and accessories.

Sewing Leg End


When I decided that the Leg was sufficiently stuffed I simply Blanket Stitched the last flat part together. I have left about a fingers Width gap without Stuffing.

4 Inch Mark


I Folded the material then measured and Marked 4 Inches. This represented the approximate Length of the Thigh.

Back Thigh


Using the Mark I drew upwards making a Thigh shape. I Pinned the material together to avoid it slipping when I cut it out.

Front Thigh


Although the process for the Front Thigh was the same as the Back this was about a centimetre shorter. The Width was slightly less to keep the proportions correct.

Replica Thighs


To make a pair of Thighs for the other side of the Body I simply Pinned to more material and cut out around them.

Thigh Attached


IMPORTANT
When Attaching the Thigh to the Leg make sure that you have slipped the Leg End into the Thigh Horizontally before you Sew. Otherwise it will be at the wrong angle.


Thursday, 19 December 2019

Dionne’s Draught Excluder 2019 - Part 4


Dionne’s Draught Excluder 2019 - Part 4

With the run up to Yule and Christmas or as I refer to it the ‘Silly Season’ I have decided to make this a short blog.

Black Paw Outline


The part I am working on this time is making a Paw. I Fold the material and then draw a Rectangle in Chalk on it. I Pin the material together so it doesn’t slip whilst I cut out.

Black Paw Replication


The easiest way to get the other Paws was to Pin the first one I cut out onto the Folded material again. I could then Replicate the Paws until I have 4 in total.

Paws Four One


Once I had cut out all 4 Paws I proceeded to Blanket Stitch the Edges nearly to the end. I then strengthened them by using a Tacking Stitch underneath.

In the photograph above the Top Paw is how it looks when I finished Sewing. The 3 Paws underneath have been turned the Right way around.


Thursday, 12 December 2019

Dionne’s Draught Excluder 2019 - Part 3

Dionne’s Draught Excluder 2019 - Part 3

Time for a change.

Mixed Template Sizes


Since I was having a bit of trouble with Sewing I thought I would swap to something different. I wanted a Pom-Pom so first I had to get my equipment.

I can’t say how long I spent rummaging around the place trying to find something to draw around. Nothing was the right Size. In the end I had to use a Pasta Measure for the Interior hole. I was then forced to use the Arch shape of the end and keep turning it until I got an Outer Circle I could cut out.

Good Judgement


Well I must admit I am impressed. I Judged the Size and Wool to perfection. It is about time something went right. Not only that the Wool I was using was some that I had hand spun.

Fluffy Pom-Pom


I have now spread, tied and cut out the Pom-Pom. This is an unusual step for me because I usually have already made the item for which to put one on.

There are Full Instructions on how to make a Pom-Pom in previous blogs. See - Watch Out There’s A Minx About 2019