Thursday, 12 May 2022

Crikey Not Christmas 2022 Part 5

 Crikey Not Christmas 2022 Part 5

Okay I think I have found a Solution.

Scrap Green


In order to get around this particular problem I am going to Cut the Ribbed Material into 2 pieces. I am then going to fill the middle with Scraps.

Once the Scraps are Dry I shall place the 2 good pieces of Ribbed Wool at Either End. Hopefully this should make the whole thing look like it is an uninterrupted flow.

Cover Back


Having finished with the Front I turn my attention to the Back. With the adjustments I have had to make I am going to have to add more Scraps. This will be to the Back and Inner Ring.

Front Completed


The Front has come out well. Unfortunately it isn’t just this part that will be seen when Hung.

Wind Tight


I have found some Green Wool to Wind Tight around the Ring. Not only does this help keep all the Straggly bits in place but also gives a nice Decoration

It has also given me an idea.

Thursday, 5 May 2022

Crikey Not Christmas 2022 Part 4

 Crikey Not Christmas 2022 Part 4

Now I getting to the Final part of this stage.

INITIAL GREEN


This is the Initial Green Layer before I start using the Material I had in mind for this Project.

SELECT WOOL


I am using Green Wool for the last part of the Layering. This came from an unfortunately washing accident. Do Not put Lamb’s Wool on a Hot wash. It doesn’t like it.

OVERLAPPED WOOL


I am using Sections of the Wool that has a Ribbed Pattern on it. Therefore I am giving it a good Stretch so it isn’t so Prominent. Also this helps the Material go around the Sides of the Ring

Like with the other Layers I am Overlapping the Sections only this time I am being more careful.

NOT ENOUGH


Typical! I am just short of the Ribbed Material that I am using. Never mind a good Crafter can usually find a Solution.

Time for another Cuppa and a Think!

Thursday, 28 April 2022

Crikey Not Christmas 2022 Part 3

Crikey Not Christmas 2022 Part 3

The First Layer is now Dry and I can Crack on.

More Material


I sort out another lot of Material. Again this is bits of my Hoard that are unsuitable for most Projects.

Scrap Material


I first add the Scraps of Yellow Material. I really don’t like this. I think it is some kind of Polyester and must have been given to me by somebody as not the sort of thing I would buy.

 Complete Ribbed Layer


After using the Scraps I Completed the Second Layer by using a Thicker White Ribbed Material. This helped Bulk out the Ring. I must watch how I continue Layering as some parts of the Ring look Thicker than others.

Dark Layer


Finally the Dark Layer. This Material is a real pain. I have tried using it on several Projects only to have to start again or Cover Up. It is so Thin that a Single Layer cannot be used.

Also if you look at the above photograph you will see that the Glue shows up making it seem a mess.

Thursday, 21 April 2022

Crikey Not Christmas 2022 Part 2

 Crikey Not Christmas 2022 Part 2

Did you work it out? I am going to make a Christmas Wreath.

White Strips


After sorting through my Hoard I decided on using White Strips of Material. Most of these are Offcuts from Pattern. Since quite a few have writing on they aren’t much use for other things.

Smaller White Strips


Now I have my Material I need to Cut it into Finer Smaller White Strips. Otherwise it is going to make the Process bulky and difficult to do.

Begin Wrap


Taking the Largest of the Three Rings I begin to Wrap. I am not bothering with using special Fabric Glue at this point. I Wrap all the way around at a slight Angle.

First Layer Complete


Here is the First Complete Layer. When I say Complete Layer I am not referring to once around the Ring. As you can see in the above photograph it has grown quite a bit in Girth.

This took several times around the Ring with gradually using Thicker Strips of Material. It is quite Time Consuming as you have to wait for the Glue to Dry. Therefore Layer in this case refers to the Finish of one Selection of Material


Thursday, 14 April 2022

Crikey Not Christmas 2022,

Crikey Not Christmas 2022

I started making this in January 2022. This is going to be a nice short blog.

Essential Kit


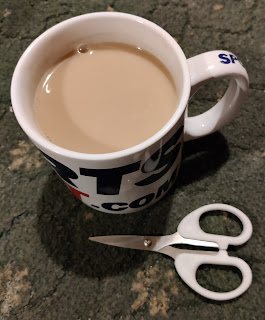
The most Essential part of Kit for any Crafter is a Cuppa of your preference. Mine is Tea and I need a large Mug for what I have to Tackle.

Craft Hoard


Why am I already thinking about Christmas? The answer is simple. As any Crafter will tell you they end up with an absolute Hoard of Crafting Items. The above photograph shows only a Small Selection of what I have accumulated.

This is my Material Hoard. It develops by a mixture of left over items from previous projects that and I quote ‘might come in handy’ plus donations from friends and acquaintances.

Three Rings


I decided that I need to Declutter as I am simply running out of room. Therefore with my trusty Cuppa in hand I put on my thinking cap.

After getting rid of bits that really were not saving I found a Set of Three Rings that I had bought. Inspiration settles upon me. What do you think I am going to make?

P.S.

The clue is in the title.

Friday, 8 April 2022

The Problem with Pom-Poms– 2022 Solution is Snow Joke

 The Problem with Pom-Poms– 2022 Solution is Snow Joke

I hate Waste. So here is a Novel idea I came up with how to deal with the Problem the Pom-Pom had caused.

Spare Pom-Poms


I had the Large and the Medium Sized Pom-Poms left. You can see what I meant about the Original one being so rough and uneven. So what could I do with them?

Sew Pom-Poms Together


As I was holding them both in my hand I had an inspiration. By putting one on top of the other I could make the base of a Snowman. Fortunately the Tails were still attached so I simply Sewed them together.

Add Stick


Rummaging around in my Craft Cupboard I found a Stick. It was intended for a different project but it was so ideal I decided to use it now. I simply slipped the Stick through the Centre of the Lower Pom-Pom

Nose Job


For the Nose I took a Medium Sized Toggle and Coloured it with a Black Permanent Marker. I got some Superglue and spread on one End. Then I pushed it firmly into the Centre of the Head.

Snowman Complete


To complete the Snowman I Glued on some Googly Eyes. The added a Ribbon off an old wooden tobacco box I had been given. I love Boxes! The last thing I made was the Hat.

I cut a Circle out of Black Card. Next I took a strip of Card and Rolled it to make a Tube. I Cut a Smaller Circle the same size as the Tube and Stuck it on Top. Then all I had to do was to Glue the other End onto the Large Circle. Finally I Stuck the Hat onto the Snowman.

Pieces of Pom-Pom 


The Snowman might now be finished but I was still left with a huge pile of Yarn Trimmings from my desperate attempts to get the Original Pom-Pom down to size. I also had dozens of Tail Ends from making the Hat and Scarf. Not to mention the stray pieces of Yarn that had simply fallen out the Pom-Poms.

12 Owls


I hadn’t found a Christmas Card that I liked for my friend and with another jolt of inspiration I came up with this. The 12 Owls of Christmas cut out and Stuck on a Pleather Tree. I used the Trimmings as Snow.

Bah-Humbug


The Card I made for Danny was a nod to his Nott’s County Hat and Scarf Set. Also we had not long watched ‘The Muppet’s Christmas Carol’. Therefore by carefully Gluing Strips of Yarn onto the Card I created a pile of Humbug’s.

It was an extremely fiddly job and the Yarn came off almost as much as it went on to the Card. In the end it was worth it to see his face.

Incidentally ‘What is Scrooge’s favourite Hat?

It’s a ‘Humburg’ of course!

Thursday, 31 March 2022

Nott’s County Hat 2022 – The Problem with Pom-Poms

 Nott’s County Hat 2022 – The Problem with Pom-Poms

Making Pom-Poms for the Hat proved more difficult than I thought.

12cm Diameter


The Pattern said that I needed a 12cm Diameter Ring. Personally I thought that this was rather on the Large side but I went with it.

Finding Centre


After drawing and Cutting out the first Circle (I needed 2) I had to find the Centre. I was a bit tired so it took me a couple of goes. I did this by finding the halfway mark and drawing across then turning it 180 degrees and doing the same.

By measuring across the Quarter you can tell if you are equal. As you may realise I didn’t have a protractor at hand. I then found something smaller (see above photo) to use to make the inner Circle.

Circle and Slit


I am trying a New Method this time. I usually Cut Out 2 complete Rings and use those. This time I am adding a Slit. Apparently this makes it Faster and Easier to Wind the Yarn

Off at End


I am not sure I like this New Method. I am finding that the Yarn is slipping off the End. I keep having to Push it back On. Also I am finding that the Winding is not so evenly spread.

Off Again


Oh for heaven’s sake it keeps happening. I don’t know if it is because this is my first attempt or the Slit is too big. In either case I am not impressed.

Hat and Pom-Pom


I finally managed to get the Pom-Pom done. I tied the Yarn around the Centre in between the Cards pulled tight and Knotted. Then it looked a little uneven so I Trimmed it.

However when I tried to Sew it to the Hat it flopped about all over the place. It was ludicrously big. I tried giving it a really good hair cut but to no avail. I was going to have to start again.

Hat Completed


In the end I made 3 Pom-Poms of various sizes. The latter 2 I did using my usual method and they came out much better. Whether the Size was written incorrectly or because the Patten was a Ladies Hat I’m not sure.

I think next time I will just do it my way. At least it looks good with the Smaller Pom-Pom Sewn on and Danny was very happy with it.

Thursday, 24 March 2022

Nott’s County Hat 2022

 Nott’s County Hat 2022

This blog is a follow on from the Nott’s County Scarf 2022

Black and White


I have a habit of over buying Yarn. My principle is I would rather have too much than too little. There is nothing worse than running out and not to be able to match the dye lot.

Hat Pattern


Since Covid hit we are unable to return unused Yarn. Therefore I asked Danny if he would like a Hat to go with his Scarf. He replied in the affirmative and therefore we went Pattern hunting.

It was amazing how difficult it was to find a simple Mans Beanie Pattern. In the end I bought a ladies one and would have to adjust as I went along.

Ribbed Stripe


My first adjustment was the Needle Size. I needed to make the Hat big enough for a Man. Since I didn’t want to muck about with the Stitches as it was a Ribbed Pattern I went up a Size and Knitted quite Loosely.

I was so intent on adding the first Stripe that I forgot to change Needles again. I didn’t realise until I had done that until the second Stripe. With this in mind I decided the best thing to do was to keep trying it against my boyfriend’s head.

Decreasing


I tried to keep the Stripes equal in Width whilst Decreasing. I decided to end with a Black Stripe to match the Bottom.

Hat Knitted


Once Knitted I had to Sew it up. I made a slight mistake Sewing up as I forgot to Reverse it on the Bottom for when it is Folded. Now I had to make a Pom-Pom. That is another story.

Pattern and Wool from Button Moon

https://www.facebook.com/buttonmoonarnold