Thursday, 25 January 2018

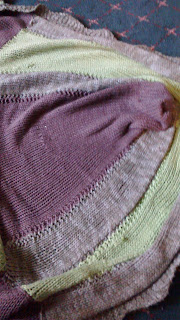
Autumn Cape A Long Term Project - Inside Toggles Part 1

Autumn Cape A Long Term Project - Inside Toggles Part 1

I am a bit behind with writing up my blogs over the Yuletide period. I did this section of crafting a while back and trying to remember what I did and in what order so please bear with me.

After I had finished sewing on the Toggles and Loops on the exterior I needed to sort out the interior. I can use the Loops already sewn on. Firstly I pinned the Bottom Rib together to make sure it didn’t move.

Inside Bottom Night Time Toggle Pinned


I needed to sew on new Toggles to hold up the weight of the Front Piece on the inside because otherwise it would drop below and hang down beneath the exterior wrap over.

Inside Bottom Night Time Toggle Sewn


I decided the best way would be to start from the bottom and work upwards. I therefore pinned a Toggle in place on the Night Time side then sewed into place.


Inside Bottom Daytime Toggle Pinned


Once I was satisfied with the Night Time side I pinned a Toggle opposite on the Daytime side.

Inside Bottom Daytime Toggle Sewn


I then sewed this Toggle in Place so there was a Toggle on both sides of the garment. This was a little more difficult because this time the Toggle was against a Green background. I had to be very careful that the thread did not come on to the other side

Inside Night Time Toggles Pinned


The next task was to pin and sew the rest of the Toggles in place. I continued pinning upwards on the Night Time Side then disaster struck. I realised that I only had enough Toggles to do one side and not even all the way up to the top.

I sewed on what Toggles I could and put a brooch pin through the top to hold it. It was only a stop gap measure but it did mean that I could wear it for a few moments outside on the Winter Solstice.

I ordered some more Toggles and they have arrived so hopefully I will be able to continue on with Part 2 very soon.


Thursday, 18 January 2018

Yule Present 2017 Leads To New Skill

Yule Present 2017 Leads To New Skill

I mentioned a couple of blogs ago how Laura from Alyssa Rose Boutique (https://www.facebook.com/Alyssa.Rose.Boutique/) had given me a great deal of craft items. These included some tools I had never seen before.

Small Tool


Medium Tool


Since they had originally belonged to Laura’s Gran I thought I would ask my mum if she knew what they were. She had never come across them either so time for an Internet Search!

Large Tool 


I should mention at this point that the Large Tool I couldn’t really see because it was incorporated into a project started by Laura’s Gran. Therefore I knew that the tools were old, metal and used for some kind of sewing craft.

I used various descriptions to search through images. I finally found what I was looking for and I was lucky enough to find a website linked to the photograph.


I heartily recommend going to this site as it will explain far more than I can. A brief synopsis is that the tools are from the 1920’ – 1930’s and known as Kay’s Practical Embroider.

Kay’s Practical Embroider


This is the set after I had got them out of the material and cleaned up. What I learnt is that there are two sets. There are others that are just small leaves/petals and two small circles. I am not entirely sure whether this is a complete set or a mixture of both.

This craft work is known generally as Plush Work, Chenille Work or Amish Stump Work. As far as I can tell from my research that there are differences between the three and I think Plush Work is the best term.

The principle is like that of making a Pom-Pom. Wind yarn around the template and then cut along the middle and remove the template. I decided to try and finish the project Laura’s Gran had started.

Laura’s Yule Present 2017

I was very nervous doing this but I think the result is quite good. For those that are interested the Three Red flowers were done by Gran along with the leaf and stalk of the largest flower.

I did the infilling of the petals and the dark green part of the large flower. I also finished the pink flower and other stalks plus the embroidered leaf and the plush leaf.

I wasn’t quite sure what kind of yarn had been used before but I decided to use embroidery silks. This gave a lovely soft feel to the work.


So thanks very much Laura that is another string to my craft bow.

Thursday, 11 January 2018

Autumn Cape: A Stitch in Time Saves 9 – Part 4

Autumn Cape: A Stitch in Time Saves 9 – Part 4

This blog continues with the repair of the Green Cape

Pocket Blemish


The first repair I did was the blemish on the pocket. I know the pocket looks awful being twisted and lopsided even without the blemish. However please remember that this was my first ever attempt at making a pocket.

Pocket Flower


I was limited to colours because of the dark background. Therefore I chose to use White and Green to make the flower. I then used the multi-toned colour for defining the petals

Pocket Side Blemish


This blemish is on the same side as the pocket but near the top.

Side Flower


Since it was on the same side I thought I would do the same sort of flower. I am not very good at distinguishing flowers but I think it looks a bit like a rose.

Sleeve Hole


This sleeve only appeared to have a minor hole and small blemish on it.

Sleeve Flower


I decided to put a leaf where the small hole was then embroider up and cover the blemish with a bloom. 

Sleeve Many Holes


The opposite sleeve seemed to be riddled with holes and blemishes.

Upper Sleeve Flower


The upper part was easily fixed with a small White and Purple flower.

Other Side Two Flowers


 I did two different kinds of flowers. The upper I think looks more like buds just beginning to open up – or alternatively some kind of cactus.

One thing I haven’t touched on is the sheer difficulty of trying to embroider in such a small space. The upper part near the shoulder is not too bad but the further down the sleeve you get towards the cuff it because a nightmare.

I sincerely hope that this is the last time I have to do any embroidery on it for a couple of years.


Thursday, 4 January 2018

Autumn Cape: A Stitch in Time Saves 9 – Part 3

Autumn Cape: A Stitch in Time Saves 9 – Part 3

Happy New Year 2018

This is the 3rd blog in the series and ironically each one has been in a different year. The 1st was published in 2016. The 2nd was the final blog of 2017 and this blog is in the initial week of 2018. It also means that I have completed last year’s resolution of posting a blog every week for a whole year!

Hood Side Blemish


In this blog I am continuing with the mending of the Green Cape. There are several problems that need doing so in this part I am concentrating on the Hood. If you look towards the top of the above photograph you will see a small blemish on the Green part of the Hood.

Hood Several Blemishes


There are several other blemishes on the Hood that need fixing. I will divide them into sections for ease.

Hood Left Side


I originally only spotted one area that needed fixing - the bottom part of the Hood. I first covered up the area with a Brown flower then I added the stalk and a leaf. The idea was that if any of the surrounding area began to come loose I could connect them with more stalks.

The one at the top of the Hood was far more difficult. It was so close to the join I had to work it in a different way. Normally I do the centre part of the flower then add the petals. This time I had to do an outline of the top and left petal before I could tell where the centre needed to be. I then in-filled and added the other petals.

Hood Right Side


This side had blemishes and holes galore. It was going to take a bit of a think to sort it out. Since I had used Brown flowers on the other side I decided this time on Purple flowers with White centres complete with stamens.

I used the connecting stalks idea with smaller flowers and leaves at the bottom. As I got to the top I made the leaves slightly bigger and made the top flower into a large bloom as a focal point.

Hood Middle Section 


This Middle Section took the most work. Since the background was Brown I gave me an opportunity to use up some of the Green Bamboo Cotton I had.

I used a slightly different technique on this section. Since there was such a large area to cover rather than doing straight stalks I endeavoured to make them bend and twist.

I felt that this gave them a more naturalistic look and also meant that if any part came loose in the future it would be far easier to add a small stalk and leaf to cover it up.

Next time I will continue on other areas of the Cape.