Thursday, 29 April 2021

Out of Zone Accessories 2020 Part 4

Out of Zone Accessories 2020 Part 4

I am on the last stretch of my Accessories. I am going to make a Bracelet.

Pocket Chain


I have one Pocket Chain left. I linked it together to form the basis of my Bracelet.

Dirty Washer


I wanted a good selection of items to put on my Bracelet as Charms. I happened upon this one in the street.

Clean Washer


After a spot of scrubbing the Washer came up much cleaner. This is going to be the Centre Piece of the Bracelet.

Looped through Washer


I took a length of Copper Wire and Folded it and placed the Loop through the Washer.

Pull through Washer


I pulled the Wire through the Loop until it was tight.

1st Washer Tied


Once the Washer was secure I Threaded the two Wires through the Bracelet. I Trimmed the Length and Wound the Wire back on itself to secure it.

I placed this particular Washer near to the join of the Pocket Chain. This Washer is both the largest and the heaviest so would anchor it underneath the Wrist when worn.

Completed Charms


I continued adding different sized and coloured Washers at intervals on the lower half of the Bracelet. I didn’t want them all the way around because the Copper wire would make it stiff and therefore uncomfortable.

Steampunk Set


In the above Photograph I have my completed Steampunk Set.

Thursday, 22 April 2021

Out of Zone Accessories 2020 Part 3

Out of Zone Accessories 2020 Part 3

On to making the Brooch.

Brooch Edging


I took a piece of black material approximately 3 inches Wide. It was quite long so I Folded behind and Hemmed it all the way around. I took my Copper Wire and made a Knot.

I Sewed through the Knot to secure the Wire. I then Sewed through the Copper Wire Links all around the Edge.

Brooch Timepiece


Amongst the items that my friend Laura of https://www.alyssa-rose.co.uk/ was a delightful little Button Timepiece. I Sewed this into the middle of the Cloth.

Brooch Cog 1


I started in the Bottom Right Corner and began to Sew some of the Copper Wire onto the Cloth towards the opposite Upper Corner.

I Sewed the 1st Silver Cog into place then bent the Wire around it and secured it.

Brooch Cog 2


I continued Sewing the Copper Wire and placed a Bronze coloured Cog on the Material. I Sewed the Cog in place then manoeuvred the Wire around it and under the Button.

Back Brooch Pin


At this point I thought it would be a good idea to tidy up the Back of the Brooch. I used a Backstitch along the two Edges.

I Sewed the Flap and added a Safety Pin after I had finished adding the rest of the Cogs and Copper Wire.

Brooch Cog 3 & 4


Starting from the Upper Left Corner I added another Knotted Copper Wire. Using the same technique I added two more Cogs. 

Finished Brooch


I had found one more Cog hiding amongst my bits and pieces. I had Sewn the Copper Wire in place and slipped it into place and secured. I now had a Finished Brooch to add to my collection.


Friday, 16 April 2021

Out of Zone Accessories 2020 Part 2

 Out of Zone Accessories 2020 Part 2

My next challenge was to make a Necklace to go with the Earrings.

Reconstruct Chain


The first part was to Reconstruct a Chain. I found various bits of Chain and Clasp and put them together. I did have enough Copper Wire to make a whole Chain but thought it would be too scratchy around my Neck.

Add Copper Wire


At the End of the Reconstructed Chain I added the Copper Wire. I slipped it through the Chain and then Twisted it Back upon itself to secure. I am doing both sides simultaneously.

Washer and Ring


Using the same technique as the Earrings I added first a Washer then an Eyelet Ring I am trying to use the same types of materials that I have used before on the Earrings and Mask.

Three wires


After the Eyelet Rings I Looped both Copper Wires through an Embellished Ring. I still had lots of Length left on my Wires so I then Folded them back and Looped through the Eyelet Ring

Once I had done this I Looped them back through the Embellished Ring. Then I secured the Copper Ends. This gave Three Wires between the two Rings.

Two Wires


To finish off I decided to add a smaller Length of Copper Wire between the Eyelet Ring and the Washer. After Securing I then stretched the Wires.

So there you have it. A Necklace with a Single, Double then Triple wire effect.

Thursday, 8 April 2021

Out of Zone Accessories 2020 Part 1

 Out of Zone Accessories 2020 Part 1

Continuing on from Out of Zone Mask 2020

I couldn’t just stop at the Mask. I had to Accessorise. I had tonnes of Copper Wire already Plaited so all I needed was the inspiration.

Copper and Cog


I hadn’t used all the Cogs up on the Mask as sometimes less is more. The little beauty in the above photograph was dying to be used.

I therefore made a Knot in one end of the Wire and slipped it through one of the Cogs holes.

First Washer 


The next part was slightly trickier. I Looped the Wire through the Washer and pulled firm. I had to undo and redo this several times to get the Distance that I wanted between the Cog and the Washer. I then ran the Wire under its back then Looped it again around the other side.

Second Washer


Now I had one Washer in Place I repeated the process with another Washer. I am not putting any more on since they are metal and I don’t want it to be too heavy.

Earring Hoop


Earring Hoops were the one thing I didn’t have so I ended up buying a job lot off eBay. I sorted out which colour looked best then slipped the Wire through the Hole. I then Cut the Wire and Wound it back upon itself.

I made the other one and tried them on. They weren’t only still pretty light but also looked Fabulous!

Thursday, 1 April 2021

La Costumière 2020 Part 3

 La Costumière 2020 Part 3

This is the final Part of La Costumière.

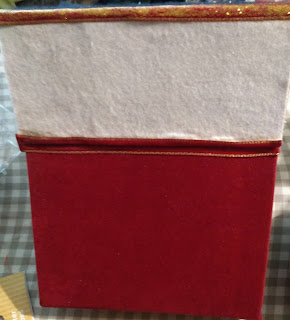
Glue Interior


I like to keep my finished projects as tidy as possible. Therefore I am Gluing Ribbon over messy areas. I started by doing the Interior.

Glue Half


The Exterior was more difficult to add Ribbon to as it had to Fold over a Corner. I decided therefore to Glue it in two sections. First I Glued the Ribbon upright then once it was dry I Glued the second Half and weighted it so it wouldn’t flip upright again.

Glitter Up


Once the Ribbon was dry I added a touch of Sparkle with some Gold Glitter.

Double Glitter


I then proceeded to Glitter the other Ribbons. I decided on Gold as it matched the Edge of the Ribbon.

In Case


Here is the Box in my Bookcase to show how it will look. Now all it needs is wrapping ready for Christmas.