Thursday, 30 July 2020

Dis-Mask-Trophy 2020

Dis-Mask-Trophy 2020

We have all had problems with projects. However this one was such a corker I felt it deserved a blog of its own. I have entitled it ‘Dis-Mask-Trophy’. This is a play on the word Disastrophy. According to the Urban Dictionary it is a slang word devised from the combination of the words Disaster and Catastrophe.

Circles for Starters


I started with the basic Mask shape and wanted to embellish it. I decided that I would use Circles.

Full Circle Hemmed


I cut out and Hemmed the Circle. So far so good.

Circle Parts


Next I cut out the remaining Circles. I cut two in Half and one into Quarters. I then Hemmed them as I had the Full Circle.

Pinned Full Circle.


I folded the Mask in Half. I then found the Centre and Pinned the Full Circle to it. I made sure that the material on both sides was Equal.

Pin Half Circle


I slipped one of the Half Circles Underneath the Full Circle at the Top.

All Half Circles


I then slipped the rest of the Half Circles Underneath. It took quite a while to get them aligned how I wanted them. Once I had I decided to Pin them in place before the next step.

Sew Full Circle


I Sewed the Inner Edge of the Full Circle with a Tacking Stitch removing the Pins as I did so. This left the rest secure but still mobile.

The Quarters I was going to add in-between the Half Circles. In case you haven’t worked it out yet I am endeavouring to make a flower. I will be adding Embroidery detail once I have finished the Sewing.

Dis-Mask-Trophy


Glad I checked how it looked before continuing. It is one of those ideas that is great in Theory but Disastophic in practice.

Thursday, 23 July 2020

Leg-End Recycling 2020

Leg-End Recycling 2020

A quick blog about adaption.

Beyond Repair


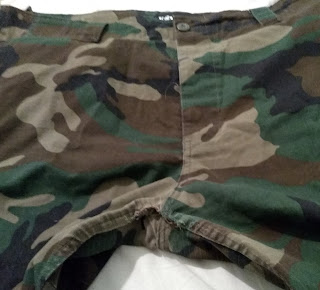
A pair of trousers are after originally trying to Repair have now gone Beyond Resewing. Therefore I am going to adapt them into something new.

Pin to Cut


I have cut off the Top and Curved the edge to remove the gusset. I have saved the rest of the material to remove the Zip at a later date. (Incidentally as there are two Legs I am simultaneously copying this process on the other.)

I have a good Inch of material earmarked to use for Hemming. I took this into consideration whilst Pinning.

Initial Hem


I Hem the Top of the material in two Sections. The first section is above the Pocket which I have managed to save as they are always useful.

The second Section is the rest of the Top of the Leg. I started this with a small gap between the two.

Strong Cord


I have Folded the Initial Hem over and Sewn another Hem. The reason I left a small gap between the two Sections was so I could thread a Cord through.

Since I intend to make this the weight bearing area I choose a Strong Cord. In truth what I found was more of a plastic than a material thread. I tied the Ends into a Loop to make a Hanger.

Drawstring


I threaded a piece of Elastic through the Second sections Hem. Since this had a lot more material to go through I used the old trick of putting a Safety Pin in one end of the Elastic to help.

Once I had the Elastic through the Hem I pulled to gather the material. I left some excess Elastic before cutting. I then Hemmed both Ends to prevent fraying and Sewed them together.

Leg-End Result


I now hung up my new Bag ready for use. Luckily it already had a Drawstring bottom. If it hadn’t I would have used the same technique as the Top.

There you have it Leg-End Recycling. I am going to use it as a Plastic Bag Holder.

Thursday, 16 July 2020

A Comfy Candy Christmas 2019 Part 6

A Comfy Candy Christmas 2019 Part 6

The next part of making the Cover is adding the Press Studs

Add Press Studs


I started at where the Top of the Cover will be. I Sewed the Right Hand Press Stud part on first (Photograph Facing). I then added the Left Hand part on the other side. There is a reason for this which I will explain later.

Press Stud Mistake


Another mistake due to not paying attention. When Sewing the Press Stud in place I went through both parts of the material. I had to unpick and redo.

Triple Press Studs


I have now Sewn three of the Right Hand Side Press Stud Parts onto the material. The reason I am doing it this way is if you look at the above photograph you can clearly see the slope.

This meant that the other side could not be in a straight line. The further down the other side of the material I went the more to the Left I had to place the rest of the Press Studs.

End of Slip Cover


I have now all the Press Stud Parts Sewn on to the material. Next I have to deal with the End of the Slip Cover.

Fold Canvas Bottom


I have quite a bit of material left at the Bottom. I either could cut off and Re-hem or try to Fold the material to make it smaller. I decided on the latter approach.

I pushed the Sides in towards the Centre. This is a bit like wrapping a present.

Sew Fold Together


I then Sewed the Fold together.

Sew Bottom Edge


After I Sewed the two pieces together I Folded the remaining Edges together and Sewed those making a nice Flat Edge Bottom.

Lollipop Finished


The Lollipop is now finished and it needs to be wrapped in time for giving for Yule.


Thursday, 9 July 2020

A Comfy Candy Christmas 2019 Part 5

A Comfy Candy Christmas 2019 Part 5

I managed to keep the Covers in place whilst Pinning the Hem

Two Hemmed Lolly Covers


I now have Two finished Hemmed Lolly Covers.

Lolly Covers Pinned


I Blanket Stitched the Two Covers together. I went nearly all the way to the Bottom. However I stopped about an inch or so before the End.

This was for 2 reasons. One was to make sure that there was enough room to Slip off the Cover. The other reason was I was unsure of the length of the material I was putting on the Bottom.

Black Lolly Bottom


The above photograph shows the length of Lolly Stick that I need to Cover with the Top Slip at full length.

Canvas Wrap Over


I Wrap the Canvas material over the Bottom of the Stick. I find I have enough to give good coverage.

Canvas Slip Cover


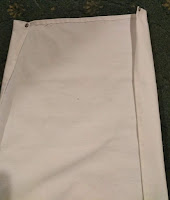
The first thing that I needed to do was Hem the material all the way around.

Slip Double Hemmed


After Hemming all the way around I double checked the material. I decided that on the Two Sides I would make a Double Hem. This is because this is where I would be adding the Press Studs.


Thursday, 2 July 2020

A Comfy Candy Christmas 2019 Part 4

A Comfy Candy Christmas 2019 Part 4

Time to start of the Outer Covering

Pin and Trim


I have found some suitable Christmas material for the Lollipop. I put a few Pins in to hold it in place and do a rough Trim

Pin Wrap Over


When I do my second Trim I make sure that both pieces of material Overlap. I Pin it in place to make sure I don’t pull whilst Trimming. This is important as I have to make sure I have enough material to add a Hem.

Hem Lollipop Bottom


Since this material frays easily I start Hemming quickly. I have put a Pin in to secure it at the Bottom whilst I do this. Unfortunately I find that the material is stretches so I am not sure how accurate it will be when I finish.

Hem Completely


I have now Hemmed one entire piece and can move on to the Second.

Pin 2nd Lollipop Piece


Even though I have Pinned this piece it is moving like mad whilst I am Hemming. I am not sure what the end result will be.