Thursday, 27 July 2017

Keep Cool and Keep Calm -Ice Inspirations 2017 Part 3

Keep Cool and Keep Calm -Ice Inspirations 2017 Part 3

This will be a shorter blog as the techniques are more or less the same as the previous blogs.

Snowman Design


First there comes the design. I was thinking of other cold related images and came up with the idea of the Snowman. It was a little ironic as I drew this whilst sitting in my garden on the Summer Solstice.

Snowman Outline


I have slightly veered off the drawn pattern as whilst sewing it didn’t seem quite right. I am once again using backstitch.

Scarf Outline


After doing a spot of body outlining I misplaced the cotton I was using so decided to start on the scarf

Hat Outline


I finished the scarf outline then started on the Snowman’s hat. I also found the other coloured cotton I had misplaced and was able to finish the rest of the body.

Hat and Scarf Detail


Now I had the outline of the scarf and hat backstitched I could begin filling in their detail.

Snowman Full Detail


Here are the final finishing touches before moving on to the next design.

Snowman Washed and Pressed


The above picture is obviously when the bag has been completely finished but I thought I would let you see the end product of this side before doing the final blog.


Thursday, 20 July 2017

Keep Cool and Keep Calm -Ice Inspirations 2017 Part 2

Keep Cool and Keep Calm -Ice Inspirations 2017 Part 2

First of all I have to apologise for the poor quality of photographs in this blog. I managed somehow to lose some so I have tried to take some post production as it were.

Snowflake Fine Detail


I put quite a bit of detail into the final part of the snowflake. First I went around the inner edges again to make them stand out. The triangular sections I put a line across to embellish them. In the diamond shaped sections I first sewed a box inside then I did a criss-cross X shape to finish off.

Igloo pattern


This is the template for the other side of the bag. I have chosen an igloo

Igloo Edged and Detailed


I apologise for the jump but the building up photo’s disappeared. It was a pretty straightforward process. I chose the outer colour a bright sky blue and backstitched the outer edge of the Igloo. I then outlined the entrance in the same colour.

For the blocks of ice I backstitched in the same blue I had used for the Snowflake.

Igloo Press Studs


From here on the photographs are after I have already finished and therefore taking retrospectively. As you can see I have put two halves of some press studs at the top of the Igloo side.

Double Press Studs


Here you can see in the above picture both halves of the two press studs sewn into place. The tops were then folded over and sewn so that the studs are hidden.

Sides Blanket Stitched


After sorting out the press studs I then folded the bag inside out so I could hem the edges with a blanket stitch. I had a change of colour for this and used an icy green.

Then all I had to do was turn it back again the right way and put the Ice Pack inside. I may do some more detailing at a later date. However I am rushing through these as I need them as soon as possible for use

Snowflake Pressed


Here is the Snowflake after being washed and pressed

Igloo Pressed


This is how the other side with the Igloo looks after being washed and pressed. I have to say that I have tried it out with the Icepack and I am so pleased with the result I am going to make another one. Details in part 3


Thursday, 13 July 2017

Keep Cool and Keep Calm -Ice Inspirations 2017 Part 1

Keep Cool and Keep Calm -Ice Inspirations 2017 Part 1

It is hot. In fact it is more than hot it is sweltering. To give you an idea last night the temperature in my flat at five past midnight according to my thermometer was 30 degrees.

Every year it seems that the summer weather is getting hotter and more humid. I don’t do summer – I hide away like a vampire and only come out when it is cooler. However the past week it hasn’t been cool inside even with the fans going full blast.

Material for Ice Pack Cover


One night unable to sleep I had a truly brilliant inspiration. I remembered that in the freezer I had some of those Ice Packs for putting in food bags to keep cool. So I jumped off the bed got one out of the freezer, wrapped some cloth around it so I didn’t get wet and clung to it for dear life.

The only problem was it kept slipping from out of the cloth. So I thought hot water bottles have covers why not ice packs? This is the actual scrap piece of material I used to wrap the Ice Pack with.

Uneven Material


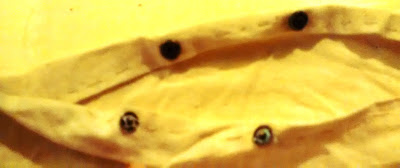
Naturally it needed to be hemmed. Since I was in a rush I didn’t trim it first but after doing some of the hemming I had to pin together to work out where I needed to hem and then trim later.

Design Idea


This photograph has come out very yellow but I have no idea why. It is the same material – calico that I have used previously. After the hemming had been done I folded the material in half horizontally. This will create the cover shape.


Design Snowflake


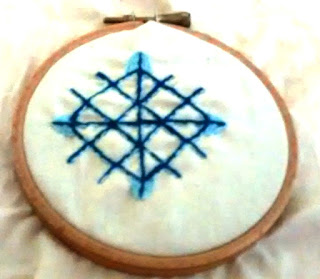
Since the previous photograph came out so badly I thought I would take one when I had finished backstitching the basic design which in this case is a snowflake. I put the design roughly in the middle of the material on one side of the cover. I will do a different design on the other side.

Snowflake Build Up


After the base dark blue colour I sewed around the whole design in a lighter blue.

Point Additions


Next I had to make it look more like a snowflake. Using the same light blue colour I sewed a triangle on to the main four points.

Extra Point Additions


As you can see I have continued the triangle shaped design so each point now is covered. I will continue the bag cover in the next blog.

Friday, 7 July 2017

Second Sewn Head Scarf 2017 Part 2

Second Sewn Head Scarf 2017 Part 2

I have my colours and am ready to start filling the second rose once I have finished the middle one.

Bottom Rose


Now here it might look like I have gone a bit wrong but I assure you I haven’t. I misplaced the thread I was using so therefore rather than try and turn the house upside down looking for it I started on the Bottom Rose

Bottom Rose Outlined


This time instead of doing a single outline and then highlighting it I have sewn a double one. I will see if this works out better in the long run.

Double Rose Completed


The double edge was much better than sewing a single edge. However I did find that even with the double I still had to touch up in places.


All in all I am quite happy with the result and I now know that this sort of project is ideal for doing whilst waiting for Election Results to come in.