Keep Cool and Keep Calm -Ice
Inspirations 2017 Part 2
First of all I have to apologise for the poor quality
of photographs in this blog. I managed somehow to lose some so I have tried to
take some post production as it were.
Snowflake Fine Detail
I put quite a bit of detail into the final part of the
snowflake. First I went around the inner edges again to make them stand out.
The triangular sections I put a line across to embellish them. In the diamond
shaped sections I first sewed a box inside then I did a criss-cross X shape to
finish off.
Igloo pattern
This is the template for the other side of the bag. I
have chosen an igloo
Igloo Edged and Detailed
I apologise for the jump but the building up photo’s
disappeared. It was a pretty straightforward process. I chose the outer colour
a bright sky blue and backstitched the outer edge of the Igloo. I then outlined
the entrance in the same colour.
For the blocks of ice I backstitched in the same blue I
had used for the Snowflake.
Igloo Press Studs
From here on the photographs are after I have already
finished and therefore taking retrospectively. As you can see I have put two
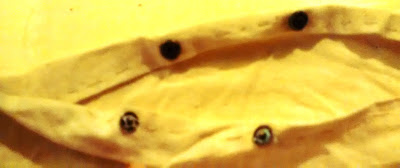
halves of some press studs at the top of the Igloo side.
Double Press Studs
Here you can see in the above picture both halves of
the two press studs sewn into place. The tops were then folded over and sewn so
that the studs are hidden.
Sides Blanket Stitched
After sorting out the press studs I then folded the bag
inside out so I could hem the edges with a blanket stitch. I had a change of
colour for this and used an icy green.
Then all I had to do was turn it back again the right
way and put the Ice Pack inside. I may do some more detailing at a later date.
However I am rushing through these as I need them as soon as possible for use
Snowflake
Pressed
Here is the Snowflake after being washed and pressed
Igloo
Pressed
This is how the other side with the Igloo looks after
being washed and pressed. I have to say that I have tried it out with the Icepack
and I am so pleased with the result I am going to make another one. Details in
part 3


No comments:
Post a Comment