Thursday, 29 August 2019

Vhere there is a Vill there is a Vay! 2019 Part 4


Vhere there is a Vill there is a Vay! 2019 Part 4

Finally I have finished Knitting the Adjusted Pattern.

Loose Ends


Since the Pattern is now finished I need to start the tidying up. There are quite a few Loose Ends that need sewing and trimming.

Beginning of Rib


Once all the Ends were taken care of I could start on the next part. This was to add a Rib to finish the Top off. I had to work out what Rib Pattern to use.

I had 69 Stitches on the needle. I intended to keep the Selvedge’s so that left 65. I wanted to have both ends the same so I used a Rib Pattern of 5 Knit and 5 Pearl.

Top Rib


I did 10 Rows then Cast Off in Rib

Curling Bottom


If you look at the above photograph you can see the Bottom of the Blanket. It is curling over. This is why I added the Rib at the Top.

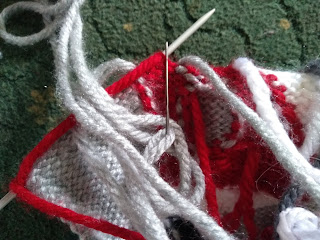
Before I can start the Rib I need to pick up the Stitches. This is the part I hate.

Thursday, 22 August 2019

Vhere there is a Vill there is a Vay! 2019 Part 3


Vhere there is a Vill there is a Vay! 2019 Part 3

I carried on Knitting the Head Lights in Light Grey.

Dark Grey Wheel


The Spare Wheel I did in the Dark Grey as the Pattern stated.

Threading Light Grey


After I realised my mistake with the colours I decided to keep all the lights Light Grey. Instead of having more loose ends I threaded the Yarn through like before.

Left Light


I found a problem with the Pattern. On the Left Side facing the Pattern it shows 2 lots of Red Stitches.

Right Light


On the Right Side facing it shows 1 lot of Red Stitches. Incidentally I found it quite ironic when the flash from the camera decided to be on the Indicators.

I decided to Knit both sides the same. I had enough to contend without making things for difficult.

Miscounted White Stitches


Another mistake. I miscounted the number of Stitches. I have had to adjust the Pattern slightly.


Thursday, 15 August 2019

Vhere there is a Vill there is a Vay! 2019 Part 2


Vhere there is a Vill there is a Vay! 2019 Part 2

Now the piece is actually beginning to look like knitting.

Grey 8.5 Inches


Since I have slightly altered the pattern I thought it would be a good idea to have a record of what I was doing. This is roughly 8.5 Inches.

Starting the Tyres


After I have used one whole Ball of Grey Yarn I started on the Tyres with the Black Yarn.

Adding the White


Once the Tyres were finished I could start on the Van’s Bumper.

All of a Tangle


The problem with adding all these Balls of Yarn is they have a tendency to knit themselves into a Tangle.

Tangle Tidied


Before I carried on I thought I better have a tidy up. I untangled the Grey and White Yarn; cut off the Black Yarn and sewed in the ends.

Long Gap


The Bumper didn’t take long to do so I started adding the Red Yarn. There was a bit of a Long Gap between two parts I needed to do.

Threading Through


Rather than adding another Ball or leaving a long Loop I decided to Thread the Yarn through the back of the Stitches.

Wrong Colour


Darn it! I have made a mistake. I have accidentally used the same Grey for the Headlights as I have for the Background.


Thursday, 8 August 2019

Vhere there is a Vill there is a Vay! 2019


Vhere there is a Vill there is a Vay! 2019

You may gather from the title that this blog has a German theme. I have a neighbour that loves Volkswagens.

VW Pattern


I found this Knitting Pattern some months back. It has four patterns in total. The one I am going to be making is the VW (Volkswagen) that is face on.

The Pattern is actually for a Cushion Cover. I am not making a Cover I am going to make it into a Blanket for my neighbour’s dog Charlie.

Yarn Used


Unusually for me I am using Acrylic Yarn rather than my usual wool. This is what I have bought to make it.

King Cole Super Chunky 3 Balls 100g
Shade 24 Grey Dye 623275

King Cole Super Chunky 1 Ball 100g
Shade 1545 Graphite Dye 620307

King Cole Super Chunky 1 Ball 100g
Shade 1758 White Dye 624047

King Cole Super Chunky 1 Ball 100g
Shade 20 Wine Dye 621490

King Cole Super Chunky 1 Ball 100g
Shade 8 Black Dye 621490

There is an extra Ball of Grey than stated for the Pattern as I was advised by my Guru Eleanor of Knit Nottingham to use 4mm needles rather than the ones stated. This will make the Stitches tighter so the Dog is less likely to catch his claws.

First Rows


Naturally being me nothing is ever simple. Although the Pattern was bought months ago I hadn’t started the Blanket. Now I am in something of a panic as my neighbour told me this week that he will be moving.

Therefore instead of using Double Moss Stitch as stated I am doing it in Stocking Stitch for speed. I have also added 4 extra Stitches so I can do a Selvedge either side.

The above photograph shows the approximate Width of the Blanket with the extra Stitches


Materials from.

Thursday, 1 August 2019

Neighbourhood Watch Banner 2019


Neighbourhood Watch Banner 2019

This year I held a triple celebration. It was my Birthday, 20 years of being a resident where I live and last but not least 15 years since I set up a Neighbourhood Watch Scheme I therefore decided to throw a party combining these events

Naturally when making the Banner I picked one of the most difficult materials to work with - Net.

Give me an H


I used Net as I had a large piece to recycle. Speaking of which I sought out bits and pieces of the Owl material I had left. I thought using Owls was ideal for the Watch Banner.

I cut out strips to make the Letters N, H and W. I then glued them together.

Secure Thread


Now came the difficult part. I had to sew the Letters to the Net. First of all I secured the thread with a couple of Stitches.

Sew at Top


I started with the Letter H as that was the middle section and therefore I would be able to place the other Letters evenly either side.

I sewed the Owl material to the Net at the top of both sections of the Letter H.

Missing N


As I feared moving the Owl material around whilst working has inevitably led to pieces coming apart.

Sew Across


I have gone back to all my glued Letters and before adding them to the Net I have sewn them at the cross sections. I then proceeded to go back and finish sewing the H in place at both the top and bottom.

Placing W


Now the H was firmly in place I could measure whereabouts on the Net to place the W then the N.

NHW Placement


In the photograph above you can see the N, H and W sewn onto the Net. The next part was to be able to attach the Banner to where it needed to go.

Holey Hell


The top part of the Banner was going to be attached to the fence by drawing pins. The bottom however needed to be tied.

By time I had finished adding the Letters to the Net this was the state of the bottom. I therefore had to mend the bottom before I could go any further. I had an idea.

Ties for Banner


I folded the Net over and sewed. This mended the rips and provided a section that I could sew the Ties on to.

NHW Banner in Place


Here is the Banner in place. It isn’t meant to be a work of art merely an indicator of where the party is being held. All in all with it being a rush job and the materials I had at hand I was quite pleased. At least everybody found me – and of course the cakes.