Mademoiselle
Marionette 2018 Part 12
This is going to be an extremely difficult blog to
write. The reason for this is I have lost my mobile phone. This means I unfortunately
do not have many of the photographs that I took.
I will try my best to get it in some sort of logical
order. One of the reasons I take so many photographs is that I often have more
than one project on the go so it helps me remember what I did.
Material
Hemmed for Arms
Although I had already covered the Arms mummy style I
thought the effect was too untidy. Therefore I cut and hemmed some material and
sewed over the Arms.
Waist
Front
This is going to be tricky. It concerns making the Waist.
If you remember I said do not completely fill the Marionette with stuffing.
This is because I needed room to manoeuvre where the stuffing was going to be.
Carefully begin to separate the stuffing inside the
Marionette by squeezing and pushing in the middle of the Body. Gently move the
stuffing inside towards the Top and Bottom of the torso.
Waist
Side
There is now less stuffing in the centre of the Body. I
took some thread and began to sew about a fingers width either side of the Body.
This brought the Front and Back Pieces closer together. I did this several
times to make sure it would hold.
Waist
Back
After doing the pinching of the material I then needed
to help make the Body into a more hourglass figure. This was accomplished by
folding over the newly sewn pinched area towards the back.
I then sewed the folded area in place. I had to do this
several times to prevent the stuffing making the Body spring back into its
previous shape.
Hemmed
Rectangle and Circles
Now the Waist is finished I am moving on to the Chest.
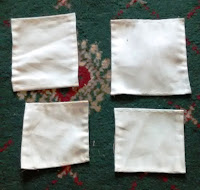
I have cut out and hemmed a Rectangle and pair of Circles.
Pin
Between Circles
Here I lost a lot of pictures. I marked the middle of
the Rectangle with a pin. Then I sewed the Circles either Side of the pin. I
then part sewed around the Circles clockwise on the right and anticlockwise on
the left.
Bra
Stuffed
This left me a gap at the Bottom in which to fill the Circles
with stuffing. I then finished sewing the rest of the Circles so the stuffing
wouldn’t come out.
Rather than just sew it straight to the Body (which
would have been much easier) I decided I was going to make it into a Bra so it
could be detached depending on what the outfit was.
Thanks Laura for the idea of how to do this and for
supplying me with the Hook and Eyes.
Bra
Front
Here once again the loss of photographs makes this
awkward to explain. The 1st thing I did was fold the corners of the Rectangle
a third of the way across and underneath. This gave the end of the Rectangle
three sides and made it less bulky and more Bra-shaped.
I then took two more Rectangles and repeated this on
one end of both of them. This would be the part that would be sewn to the
stuffed Rectangle. The other ends I folded into a point.
Bra
Back
I now sewed all three pieces together. The next step
was to sew on the Hook and Eye. I sewed them on the points. The Bra could now
be fastened.
However until I had sewn them on and saw how they fitted
together I couldn’t properly judge the length of the Rectangles needed. Once
placed on the Body and fastened I could see that the Bra was quite loose.
In order to decrease the length without having to cut
anything off and resew I came up with a simple but effective trick. On both
sides I made a simple fold and tacked across. I then tried the Bra on the Body
again.
I felt that it was still too loose so I again added a
fold on each side. Now it not only fitted properly but gave the back an
attractive pattern.
N.B.
Bra Front Construction Idea by Laura Whaley
https://www.facebook.com/Alyssa.Rose.designs


No comments:
Post a Comment