Draught Excluder
This Blog is another craft project. This time a draught
excluder I am making for a friend’s birthday present. She used to have
Dachshunds as pets otherwise known as 'Sausage Dogs' due to their long bodies.
Therefore they are the ideal subject for making a draught excluder.
1
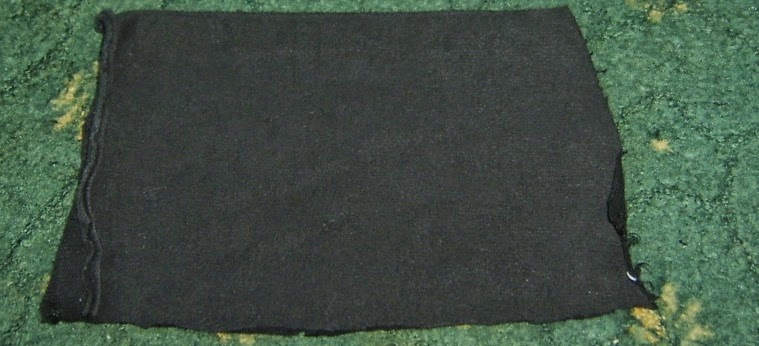
First take some material. As usual I am trying to recycle
material. In this case I have selected a pile of Black and Brown.

2
You need a long piece of material. No need for exact
measuring at this point providing the length is at least as long as your door.
My door is roughly 33 inches or 84 centimetres. The width is important
otherwise you will end up with a very thin draught excluder. I would recommend
roughly 12 inches or 30 centimetres wide as that will allow for a nice hem. If
you do not have material long enough go to step 3. If you have enough material
skip to step 5.
3
If you are short on length you can make the tube in sections
as follows. Take some material that is wide enough and cut several pieces which
when sewn together will be long enough (don't forget to allow for hemming.)
Single Piece
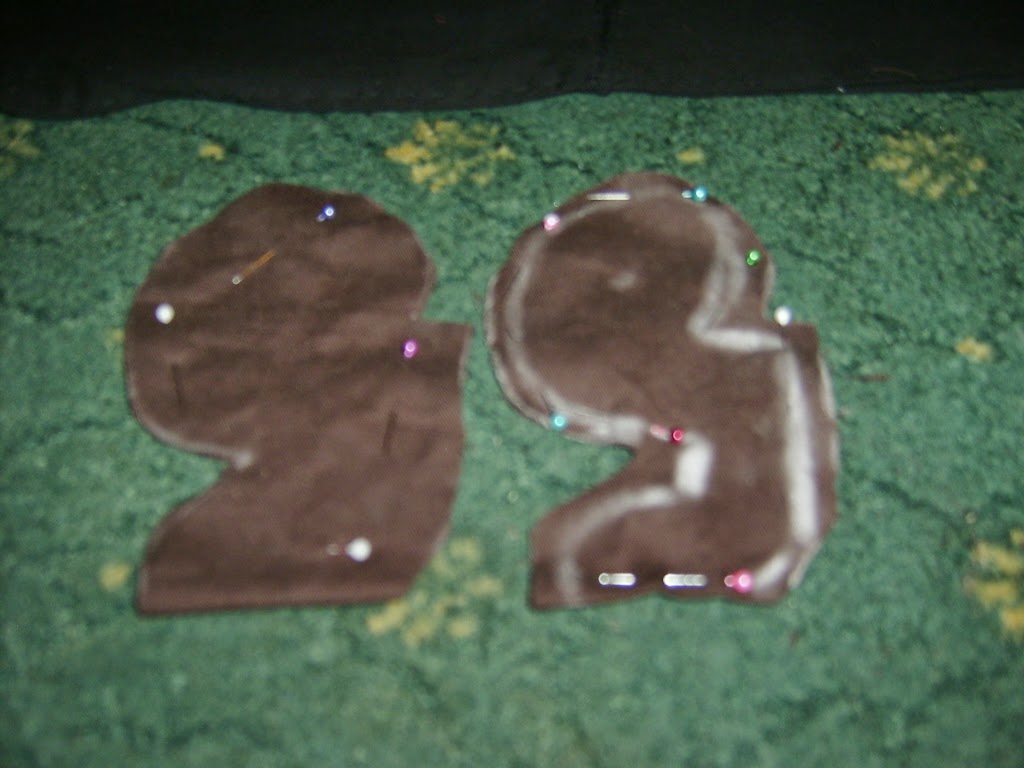
4
Layer the pieces on top of one another. Pin together to see
how much excess material you have. Then trim the pieces to all the same size.
Keep the trimmed pieces
Pinned Pieces


5
Once you have got your pieces cut out you can pin them. If
you are using a single piece of material you can hem all the way around and
move to step 10. If you are using multiple pieces as I am then read carefully.
Take a single piece and pin it top and bottom along the width. Do NOT pin the
length at this point. You can either pin all your sections along the width and
hem in one go or alternatively pin and hem one section at a time.
Pinned
along the Width

6
Once you have hemmed your sections you need to sew them
together. You can either place side by side and sew together or alternatively
overlap as I have done. Pin together then once you are happy sew along the
widths.
Overlapped and Pinned Sections.

7
Now you should have all the pieces sewn together in a single
piece of material.
Sections Sewn Together.

8
Flip the material over and hem along the sides. This will
level up any excess material.
Reverse
Side Pinned

9
Next hem along both lengths. If it doesn't go through any
stitching you can trim it to make it neater.
Trimmed

Again
do not throw away any trimmed material
10
Leave the Black material for the moment and move onto some
of the other pieces of the project. Take some of the Brown material This will
be used to make the legs. We are going to make four double pieces so we need
quite a big piece.
Brown Material

To make the pieces needed fold the Brown material in half.
That way it makes it easier to cut out the pieces equally.
Brown Material Halved

11
Taking the Brown Material and making sure that the fold is
nearest to you begin to draw a rough outline of one of the back legs. Chalk is
a good thing to use to draw the outline with.
Back Leg Outline

12
Before you cut out the material pin the front and back piece
together. This will ensure that both front and back will the same.
Front and Back Pinned

Roughly cut out the chalked leg section.
Rough Leg Cut Out

Before making any further cuts you might want to measure it
against the Black Material. Remember that the Black Material will be a
different shape when filled. Also cut out section of the back leg has to be
hemmed. This will of course make the leg smaller.
Leg measured against the Black Material

13
Once satisfied that the leg outline is the size that you
want it and the pins are safely in place you can cut out the leg out properly.
Now you have the leg cut out place it on the Brown Material. I would advise
making sure that the folds are in line. I pinned the leg in place before I drew
around it.
Pinned
Outline

2nd
Outline

Cut Out Leg
Cut out the second leg. Remember that this second outline
will be slightly bigger than the first leg that was cut out. Therefore pin both
pieces together and trim until they are both the same size.
14
The next step is to start hemming. You can either pin both
legs now or as I did one at a time.
First of all open up the leg section.
Double Section Leg Opened Out.

Pin the Hem in place. Then hem all around one of the sides
of the double section from the fold to the fold as shown below.
Pinned Hem

When you have finished hemming one side of the double
section you can then pin and hem the other side of the section. WARNING! I
suggest that you do this hemming a few stitches at a time. This is because you
want to match the two sections as near as you possibly can. When you are
hemming you may find you have to make a few small cuts at various points around
the leg. This will help you to fold the hem properly in the awkward places.
15
Once you have hemmed all the way around the double section
of the leg fold the material back on itself. You should now have the hem facing
you. Pin the sections firmly together. This is important as the next part is
sewing both sections together and you don’t want the material slipping whilst
you sew. To make the stitching secure I use the blanket stitch.
Start sewing from the bottom of one of the sides. I started
from the bottom left as shown by the white pin. I sewed all the way along to
where the blue pin is. Stop sewing when you have reached the blue pin. DO NOT
sew all the way around. If you do this you will not be able to fill the leg.
Instead of carrying on go back to the fold and start sewing
the leg from the fold up to the same point.
Pinned Back to Back.

16
Now you have sewn both sides of the leg you can now turn the
material inside out. The best side should now be showing.
Best Side.

17
Repeat steps 14 to 16 with the other back leg section you
cut out. Once you have finished the back legs you can start on the front legs.
Front Legs.

You cannot tell in the Photograph but I have made front legs
slightly smaller. Hopefully this will give the impression of the body of the dog
being lower down at the front. Obviously if I had made the black material lower
at the front this would leave a gap further along. Pin, hem and sew as you did
with the back legs. Then proceed to do the same with the other front leg.
Unfilled Legs
Unfilled Legs

18
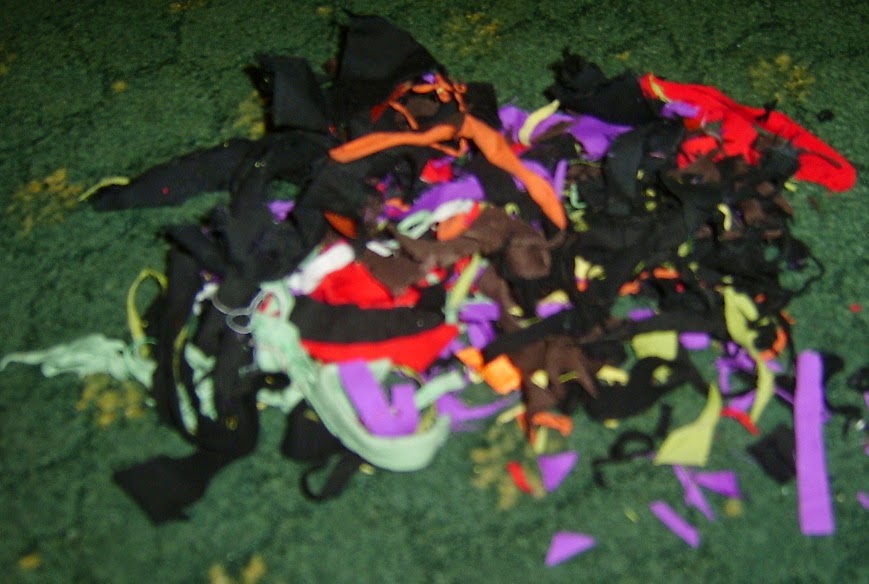
Now you can proceed with filling the leg. Take the offcuts
and any other scraps you may have and sort through them.
Scraps and Offcuts
You are looking for very small pieces that will go into the
toe of the leg. This is because you have to be able to get them past the narrow
part. I suggest that you do this a few pieces at a time and not try and push a
great deal down at once. If you are finding it difficult to get the material to
the tip of the toe try using something (not sharp) to manoeuvre it into place.
Push Filling into Place.

Keep on filling until you have nearly filled the leg to top
but leave at least a fingernails width. If you fill completely to the top it
will be difficult to sew it closed. This flatter space will also make it easier
to attach to the main body. Once you have filled and sewn the leg you can
repeat for the other three.
Filled Legs

19
Now the legs are finished move on to the next step. You need
some black material and something circular to draw around. I used a large roll
of Sellotape but a plate would do at a pinch. Before drawing around it you
might want to check it for size.
Test size

As you can see the tape appears nearly to be the right size.
However this is measured against the material when it is flat. It is difficult
to do if you are working on your own but try and see if it is the same when the
material is wrapped around the object. This is why I suggest using a roll of
tape rather than a plate.
Sewn Material Wrapped around Tape

I found when I actually wrapped it around into the tube
shape the small difference had changed to quite a significant gap. If you find
the same you can either find a larger item to draw around or alternatively as I
did allow for the difference. In either case do not forget this measurement is
WITHOUT including a hem.
20
When you are satisfied take the new black material and draw
around it with the chalk.
Chalked Outline

The above picture shows three circles. The inner one is the
inside of the tape and the middle one is the outside of the tape. You can
choose to draw around the outside of the tape only but for my personal benefit
I felt it would help me to see the circle more clearly. After I had drawn
around the tape I made a rough estimate of how much extra material I would need
including the hem. I marked this out with pins. I then drew the outer circle
freehand around the pins. The outer circle now represents the MINIMUM amount of
material required.
This might seem very long winded way just to draw a couple
of circles but in my experience it always pays to err on the side of caution.
Remember that it is always easier to trim excess material than cut out too
small and have to start again.
21
The next step is to cut around the outer circle. As I had
drawn it freehand when I had cut it out it was a little uneven so I gave it a
very careful trim to make it more circular.
Cut out Circle
If you want you could at this point trim it down more if you
think it is far too large. However I would advise against this. A better way
would be to leave it until you have pinned the hem and recheck it.
Pinned Hem

After you have pinned a hem to the circle you have a choice.
If you are happy to hem straight away do so. If not you can either trim and re-pin
the material or sew a preliminary hem and then if necessary fold it and make a
double hem.
Hemmed Circle

You now have a hemmed circle and can move onto the next step.
22
Put the circle aside for the moment
as it is not needed. Take some more Black Material. You want approximately a
piece as long as your arm from the wrist to the elbow and as wide as your hand.
This is for the Dachshunds long tail.
Rough Tail

The shape I drew to my mind
reminds me of one of the old school science beakers I used to use. I have exaggerated
the shape to allow for hemming. Once again this has been drawn freehand so in
order to ensure that it was cut out evenly I used a simple trick.
Tail Folded and Pinned

Take the material and fold it
along the tails length. Take a single pin and put it through one corner of the
bottom image. Next line the first corner up with the other bottom corner and
when confident they match up pin both together. This will give you an accurate
baseline to work from. Tweak the fold until you are happy with the shape
showing and pin.
Unless you are very good at freehand drawing you will probably
find that the chalk line isn't equal both sides of the fold. That doesn’t
matter just cut the shape out by using the outline facing you. If you have pinned
it securely then the opposite side will be a mirror image.


With a single pin attach the end
to the bottom of the circular material. With this held in place continue to pin
around the end.

Once pinned you can sew the end into
place I did this using a back stitch.


Pinned Curve


If there is not enough material remove both pins and make a larger flap and try again. When you are happy with the positioning you sew ONLY the flap into place. Next make a very small nick in the material and push the nose through and secure at the back.


Before you sew this piece you need
to check that you have left enough room to fold down a flap at the top. Fold
the flap and pin to check.

If you are happy remove the second pin and sew up to the first pin.

Again check the flap. If there
seems to be too much add more filling to the head and reassess. Once the head
is filled then sew the flap down. I found it easier to put a couple of stitches
in the middle to hold it in place whilst I sewed the rest. The head is now
finished apart from adding the ears and neck.


Repeat this hemming process with
the second piece of material. Once you have the two pieces hemmed you can sew
the two pieces of material together.

You should now have a single piece
of material that is hemmed in the middle with two unhemmed ends.


With the pins in place to stop the
material slipping you can concentrate on getting the correct length. Using a
piece of chalk mark where you want the material to reach (remember the hem
allowance).


23
Once you have cut out the tail
shape you need to hem all the way around. If you want you can pin the hem first
to make it easier whilst sewing. This will now give you a hemmed tail to work
with.
Hemmed Tail
The next step is to fold the tail
in half like before only this time inside out. Next pin the edges together ready
for blanket stitching.
Pinned Hemmed Tail
I started blanket stitching at the
tip of the tail and carried on until nearly the top. I would recommend leaving a
minimum of half an inch unsewn. When you have reached this point you can turn
the tail back to show the best side.
Sewn Tail with Gap
24
Put the tail to one side and come
back to it later. Take the long hemmed piece of material and cylinder of
approximately the correct size. I found a cardboard tube but anything
cylindrical such as a washing up bottle or jar will be fine as long as it is
large enough. Wrap the material around the tube and pin it into place.
Pinned Tube
The next part is easier if you
stand the tube on its end with the excess material underneath. Take the hemmed
circle and measure it against the end of the tube. It should be wide enough to
safely cover the tube with some overhang to sew.
Measured End
If the end is slightly too small
you have two options. Either you make a new circle for the end or alternatively
instead of the end overlapping the tube you can choose to reverse it. This means
the tube overlaps the end. I had the opposite problem my end due to exaggerated
caution was far too large. This is where the double hem comes into play.
Pinned Measured Tail
I folded the hem over and pinned
it. I then measured it again against the tube to make sure it would still
overlap. Once satisfied I hemmed it into place.
25
Unpin the material from the tube
and lay it flat. Take the circle and place it at the back end. Manoeuvre it
until it is partly overlapping the material and pin into place.
End Pinned to Material
Stitch the circle to the material.
It only needs a few stitches but it must be firmly attached. Next you will need
the tail. Here again you have a choice. You can either just sew it on directly
or alternatively as I have done stuff it prior to sewing.
Tail Pinned to Circle End.
This is where the gap at the top
of the tail comes in handy. When it is pressed up against the Circle it forms a
V shape making it easier to sew into place. Make sure that it is secure as
otherwise the stuffing is liable to come out.
26
Take the tube and once again pin
the material around it. You should find that the end now falls over the back.
Find one of the back legs you made earlier. Place it against the filled
material. Move the leg until you are satisfied it is where you want it to be.
Since the leg isn’t filled to the top it should be easy to pin into place.
Pinned Back Leg in Place
When the leg has been pinned you
can now sew it to the material. If you look at the picture above I have sewn it
from where the leg starts to curve at the top around to the same height on the
other side.
Back Leg Sewn in Place
Now one of the back legs is sewn
in place you can repeat the process for the other side. I am not sewing the
front legs on at this time as I want to ensure they are in the right place when
the head is attached. However that is my choice you can sew the front legs on
now if you wish.
27
The end and tail are now attached
to the top but need to be fastened in completely. The easiest way to do this is
to have two firm ends. Therefore turn the material inside out. Take the
opposite ends of the material and pin together. Pin along the length of the
material and blanket stitch. How far you do this is up to you. I did one
quarter of the length.
Blanket Stitched Length
28
Once you have sewn as far as you
want turn the material back to the correct side. Take the tube and insert it in
between the now circular material.
Circular Material
Pinned around End
Backstitched End
29
Put the body to one side for the
moment. Take a largish piece of Black Material big enough to cut out the head.
How big a piece you need will depend on the size of the body. In the picture below I have used a large pair
of scissors to give an idea of size. With the chalk draw a triangular piece
with the top part curved instead of straight. Think of a slice of pizza or a
cheese triangle. Once you have got the shape and size (remember to allow for
hemming) you can cut out.
Triangular Head
Pin along the two straight sides
and hem. Once these two sides have been hemmed then it is easier to pin and hem
the curved section.
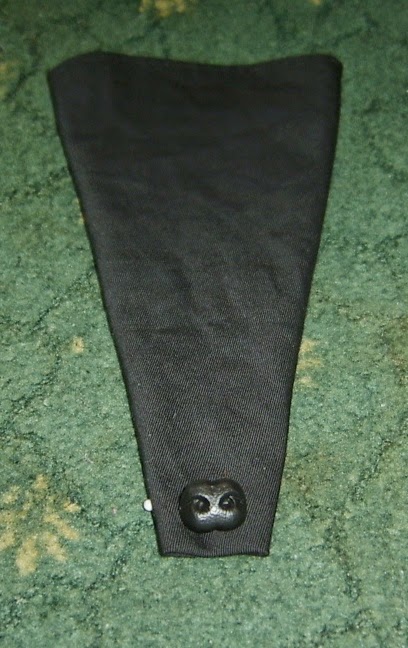
After hemming all around the next
step is to position the nose. This can be a little tricky. If you are
embroidering the nose you can adjust the instructions accordingly. First of all
you need to make a flap. At this point we are only pinning as we need to check
sizes. Exactly how far back you pin depends on how long you want to make the
head.
Pinned Flap
Now carefully fold the two sides
in until they meet in the middle and pin.
Side Pin
Turn over the material and simply
put the nose in place. You are checking to see if there is enough material to
sewn the nose on comfortably. I put a bit of chalk on the back of the nose so
when I took it off I could tell where it had been.
Check Nose Position
If there is not enough material remove both pins and make a larger flap and try again. When you are happy with the positioning you sew ONLY the flap into place. Next make a very small nick in the material and push the nose through and secure at the back.
Back of Nose
With the nose secured you can
refold the sides and pin. I used Blanket Stitch for a strong seam which went
half way up the side.
Pinned Side Fold
Turning the material the correct
way around take the eyes and check the position. Mark with chalk once you are
satisfied. Repeat the process with securing eyes as you did for the nose. Again
if you are embroidering adjust the instructions.
Eyes
30
In order to proceed with filling
the head the seam must be adequate in length. Turn over the head and place a
pin where the eyes are. Make sure that the seam is at least this far otherwise
it will make the next part very difficult.
Mark Eyes with Pin
With the seam the correct length
you can now begin to fill the head. Do this slowly a bit at a time. When you
have filled to the level of the pin remove it and pin the next bit.
Back of Head Pinned
Head Fold Pinned
If you are happy remove the second pin and sew up to the first pin.
Sewn Back of Head
Sewn Head
31
To make the ears take some Black material. To make the ears stronger and less floppy you need to fold the
material in half. Draw an outline of the ear shape. Pin front and back together
and then cut out. Take another piece of Black material and fold it.
Ear Template
Place cut out ear shape on top of
the material and draw around the ear using it as a template for the second ear.
Next unpin the material and hem all around the ear shapes.
Hemmed Ears
Once the ears have been hemmed you
can refold the material. Pin the ear material together so they are level.
Pinned Ear Material
Sew the material together. You now
have one completed ear. Repeat the process with the second ear.
Finished Ear
32
At this point you can start
putting the Dachshund together. If you haven’t already now add the front legs. Sew
along the rest of the body. Attach the second circle part way to head end.
Stuff the body to the head end and finish sewing the rest of the attached
circle into place.
The next step depends on if you
are making a neck or not. Take the stuffed body and measure next to the door
you want to keep the draught out. Place the head in front of the body. If it is
too short take a piece of material and sew one end to the head and one to the
body. Sew part way up the seam and begin to fill. Once filled you can finish
sewing along the seam. Since you are not sure how far up the head the neck will
reach I would advise sewing the ears on afterwards. However in my case this adding
a neck step was not necessary.
If you are not adding a neck then
you can attach the head directly to the body. Put a few stitches at the top of
the head and body. Next put a few stitches at the bottom of the head and body.
This will stop the head flopping around whilst you are trying to sew all the
way around. It is optional whether you add the ears before or after. I added after
so they wouldn’t get in the way whilst attaching the head.
Head Attached without Ears
Head with Ears
Technically the Draught Excluder
is now complete. However if you want to add some finishing touches carry on to
Step 33.
33
I have chosen to make a Black and
Tan Dachshund so I need to add some more material to mimic the breed. This
extra material will also help strengthen the bottom of the draught excluder.
First take a long piece of Brown Material. As I am using recycled material I’m
using 2 pieces to make up the length. Remember that you still need to allow for
hemming.
Brown Material
You might notice that the material
is not symmetrical. This is not a problem as I will be tapering the ends. In
the photograph above you might notice at the top there appears to be a piece
missing. I used this as an indicator to hem to. As I am using two pieces joined
together I did not hem all the way around.
If you are using 1 piece of
material you need to adjust the step below by hemming only the middle part
leaving unhemmed strips at both ends. If you are using 2 pieces then take one
piece of material to hem first.
Starting part way along the
material (roughly 5/8ths along as in photo above) hem along the top from left
to right. Hem around the right hand end and along the bottom until you are
level with the point you started at.
Part Hemmed Material
Two joined Hemmed Pieces
34
The Brown material is for the
Dachshund’s stomach. Turn the draught excluder upside-down so it is now on its
back. Take the piece of Brown material and lay it along the length of the body.
Take a pin and secure the material at both ends of the body.
Brown Material Pinned along
Stomach to Head.
Brown Material Pinned along
Stomach to Bottom.
Chalked Mark Head
Chalked Mark Tail
Remove the pins and cut the
material ONE END ONLY. Before you begin to hem taper the end and slowly trim a
little at a time checking the shape as you go. When you are satisfied you can
finish hemming that end. Check against where you want it to go and pin into
place. You may find that the chalk mark at the other end might need adjusting.
If it does re-measure and mark if not repeat as for the first end.
Tapered End
When both ends have been tapered
and hemmed you can now proceed to sewing the stomach strip into place.
Sewn Stomach
35
The last part is adding the pouch.
Take a largish piece of Brown material and cut out an oval shape and hem
Hemmed Oval
Attach the oval to the stomach. I
sewed it at both points then at opposite sides this left plenty of room to slip
things inside.
Finished Draught Excluder
Final Note
Remember that this is a Draught
Excluder so if you put bulky items in the pouch it will lift it off the floor
and therefore will allow draughts in. The pouch I have added is to accommodate either
very small crystals or nice smelling herbs such as lavender.
If you want to place more bulky
items in I suggest rather than have the pouch underneath put it on the side.
Also I have to make a confession. Since this was a Birthday Present I did not
add everything I wanted to because I ran out of time. After sewing on the
stomach I would have ideally liked to have made another piece to run along
under the dogs head and possibly even add a tongue.
However this is just my personal
taste and I could have gone completely mad with bits of fur etc. Anyway I presented
my gift to my friend last night and she was thrilled. That of course is the
whole point of making this in the first place.
Obviously once you have the idea
you can make all sorts of animals and it doesn’t have to be just plain or two
tone. You can use whatever material you have to hand and it doesn’t matter if
it is made patchwork style.
Here is one as they say on Blue
Peter I made earlier. I am a cat person so my own is a Black Cat.


.JPG)


